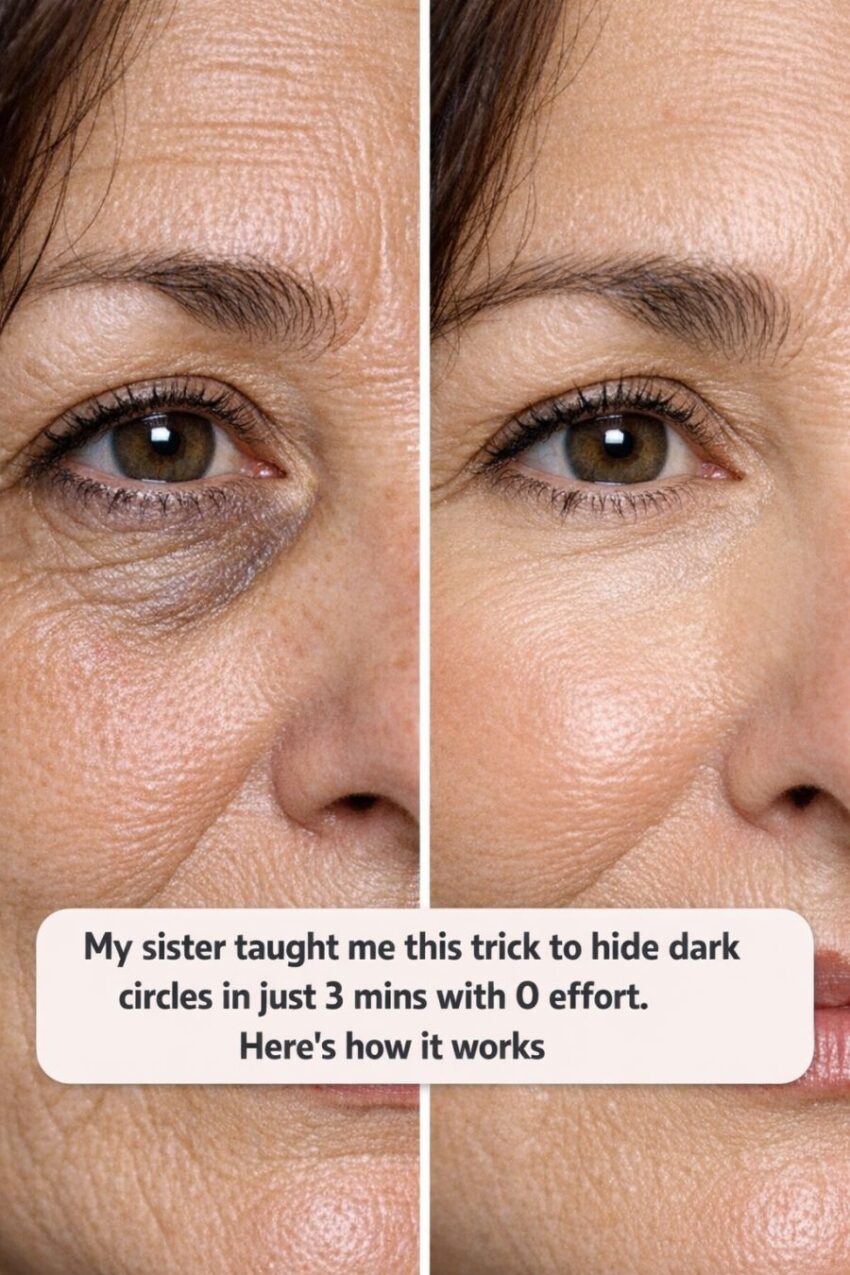
Dark circles under the eyes can be a frustrating problem, especially when you’re trying to look your best for an important meeting or a special event. For many, these circles are a persistent issue that never seems to go away no matter how much sleep you get. Whether it’s due to genetics, stress, or lack of sleep, the struggle to cover them up is a common one.
Fortunately, there are ways to minimize their appearance without spending hours in front of the mirror. My sister, a beauty enthusiast with a knack for quick fixes, recently shared with me a simple yet effective trick to hide dark circles in just three minutes. With zero effort required, this method has become my go-to solution for looking refreshed and awake instantly.
1. The Morning I Finally Asked My Sister Her Dark-Circle Secret
It was a typical chaotic morning; I was running late for work, and the night before had been anything but restful. Glancing in the mirror, I was greeted by the familiar sight of prominent dark circles. In desperation, I called my sister, who always seemed to have flawless, bright under-eyes, even on her busiest days.
“You really want to know my trick?” she laughed, as she agreed to reveal her secret. With just a few simple steps, she assured me, I could look fresh and awake, even if I didn’t feel like it. I was skeptical but decided to give it a try, armed with the tools she recommended: a hydrating eye cream, a peach-toned concealer, and a lightweight setting powder.
2. Why Traditional Concealer Tricks Fail When You’re Exhausted
Traditional concealer methods often fall short when you’re truly exhausted, primarily because they don’t address the underlying issues of hydration and color correction. Many people apply thick layers of concealer hoping to mask the darkness, but this can lead to a cakey appearance and actually draw more attention to the area.
Moreover, without proper hydration, concealers can settle into fine lines and make the skin look older and more tired. The key is to prep the skin and use products strategically to not only cover but also brighten and lift the under-eye area.
3. The 3-Minute Rule: What You Actually Need (And What You Don’t)
The beauty of my sister’s method lies in its simplicity and efficiency. Forget about the myriad of products and tools you think you need. All you need are three essentials: a good eye cream, a peach-toned concealer, and a setting powder that matches your skin tone.
By focusing on these three items, you streamline your process and eliminate unnecessary steps that can overwhelm and complicate your routine. This 3-minute rule ensures you get the most out of each product, maximizing their effectiveness without wasting time.
4. Step 1: A 20-Second Skin Prep That Instantly Wakes Up Your Under-Eyes
Start by applying a pea-sized amount of hydrating eye cream under each eye. Use your ring finger to gently pat the product into the skin, as this finger applies the least pressure. This step should take no more than 20 seconds and is crucial for plumping the skin and creating a smooth base for makeup.
The hydration from the eye cream helps to reduce the appearance of fine lines and ensures that the concealer applies evenly and doesn’t cake throughout the day.
5. Step 2: The Tiny Dab Of Product My Sister Swears By
Next, take a small amount of peach-toned concealer—about the size of a rice grain—and apply it directly to the darkest part of your under-eye circles. Peach tones help to neutralize the blue and purple hues of dark circles, providing a natural-looking correction.
Use your ring finger or a small, dense brush to gently blend the concealer, focusing on the inner corners and working your way outward. The goal is to brighten the area without over-applying product, which can lead to a heavy appearance.
6. Step 3: The “Reverse Triangle” Blend That Fakes Eight Hours Of Sleep
After applying the concealer, blend it out in a ‘reverse triangle’ shape under each eye. The base of the triangle should be just below your lash line, with the point extending towards your cheek. This technique not only covers dark circles but also highlights the cheekbones and creates a lifting effect.
Gently blend the edges with your fingertip or a makeup sponge to ensure a seamless transition into the rest of your foundation. This step should take no longer than 30 seconds per eye.
7. Step 4: The One-Second Brightening Spot That Changes Everything
Finish off the look by applying a small amount of lightweight setting powder directly over the concealer. Use a fluffy brush to lightly dust the powder, focusing on the areas where the concealer was applied.
This step sets the concealer in place, preventing it from creasing throughout the day, while the reflective particles in the powder help to brighten the under-eye area, creating an illusion of wide-awake eyes.
8. How This Hack Works With Zero Makeup Skills Or Extra Tools
What makes this trick so appealing is its accessibility. You don’t need to be a makeup artist or have an arsenal of tools at your disposal. With just your fingers and a few key products, you can achieve a polished look that rivals professional techniques.
The simplicity of the method means it’s easy to replicate, even on the busiest of mornings, making it perfect for anyone who wants to look their best without spending a lot of time or money.
9. Quick Fix vs. Long Game: What This Trick Can And Can’t Do
While my sister’s trick is perfect for a quick fix, it’s important to understand its limitations. It won’t magically erase dark circles or serve as a substitute for a good skincare routine and adequate sleep.
However, it does offer an effective temporary solution that can make a significant difference in your appearance, especially when you need to look bright-eyed for a short period. For long-term improvement, consider addressing lifestyle factors such as diet, sleep, and hydration.
10. Pro Tweaks If You Have Very Dark Circles Or Textured Skin
If you have particularly dark circles or textured skin, there are a few tweaks you can make. Consider using a color corrector before applying concealer to neutralize intense discoloration. Opt for a peach or orange corrector for blue-toned circles, and a pink corrector for brownish circles.
For textured skin, ensure your eye cream is lightweight and absorbs well to avoid adding unwanted texture. Use a damp makeup sponge to apply and blend products, as this can help prevent the makeup from settling into lines or emphasizing texture.
11. How To Make The 3-Minute Trick A No-Thought Part Of Your Routine
Incorporating this trick into your daily routine is all about preparation. Keep your products organized and within easy reach, so you don’t waste time searching for them. Practice the steps a few times when you’re not in a rush to build muscle memory, making it easier to execute flawlessly when time is tight.
Once you become familiar with the process, it will become second nature, allowing you to achieve a refreshed look effortlessly every morning without having to think twice.